A BIRT report exists to create a Building Condition Assessment Report that collects the output of completion of a UConn Facilities Building Condition Assessment Package. The report
Building Condition Assessment Package Automation |
|
| Description | What you will see |
| Navigate to the Preventive Maintenance Module in AiM | 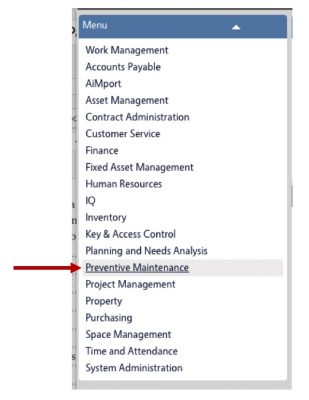 |
| Click the Magnifying glass associated with the PM Template Menu item to search for the Building Condition Assessment template | 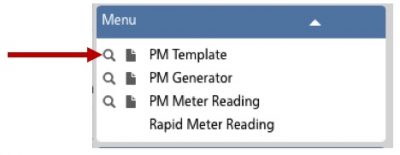 |
| In the Template search box enter BLDG-ANA then click the Execute button |  |
| Click the BLDG-ANA link in the search results |  |
| Click the Edit button | 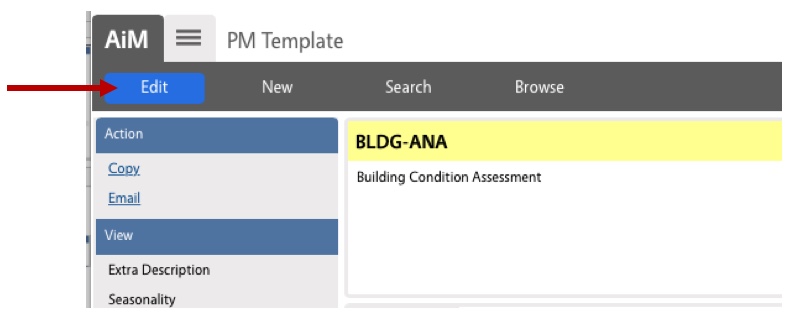 |
| Click the link to edit the first Template Phase, 001 | 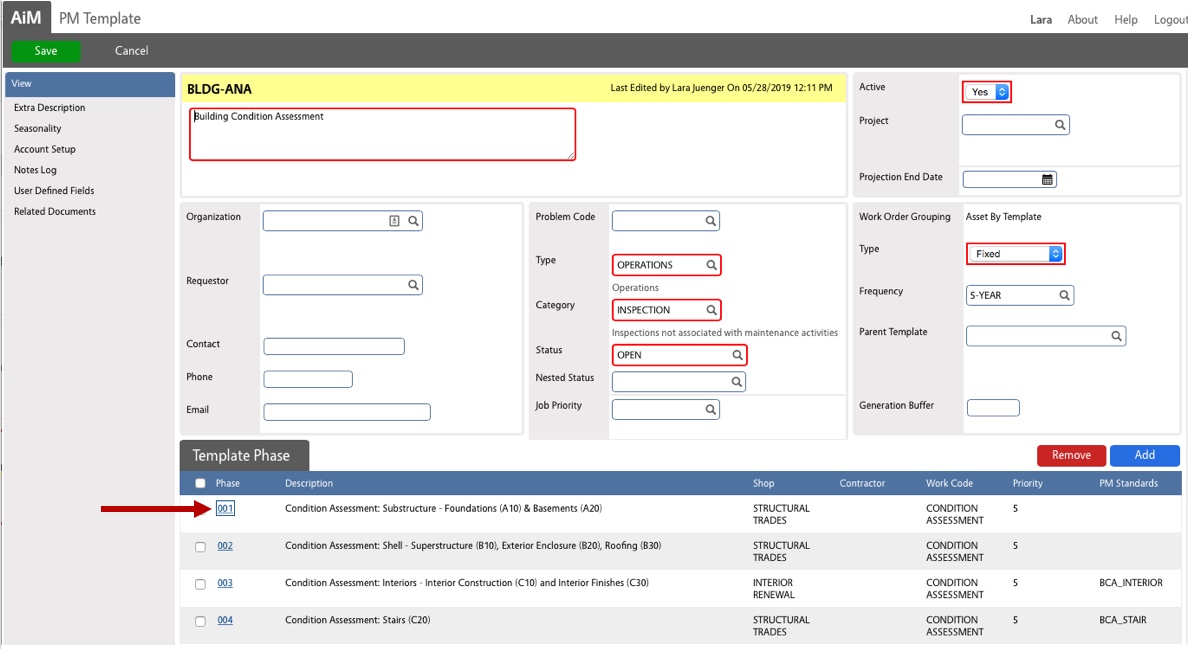 |
| Toward the bottom right of this screen Click the Load Asset button | 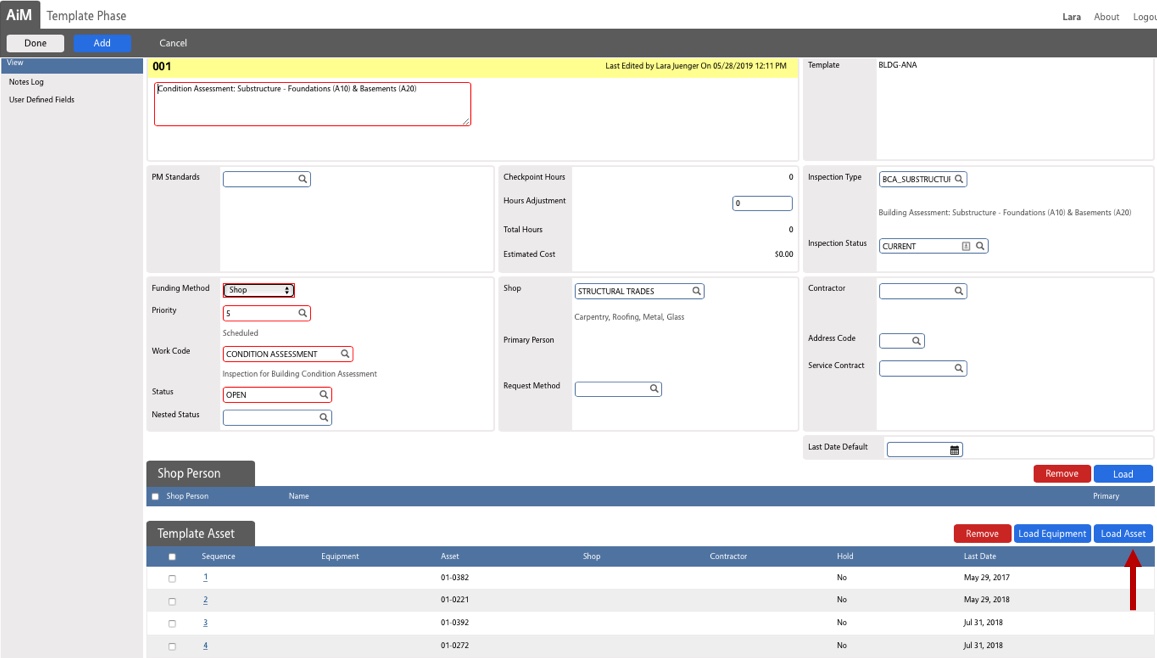 |
| Set the Asset Type to PROPERTY Set the Property to the Building Identifier, in this example, “0242” Click the Execute button |
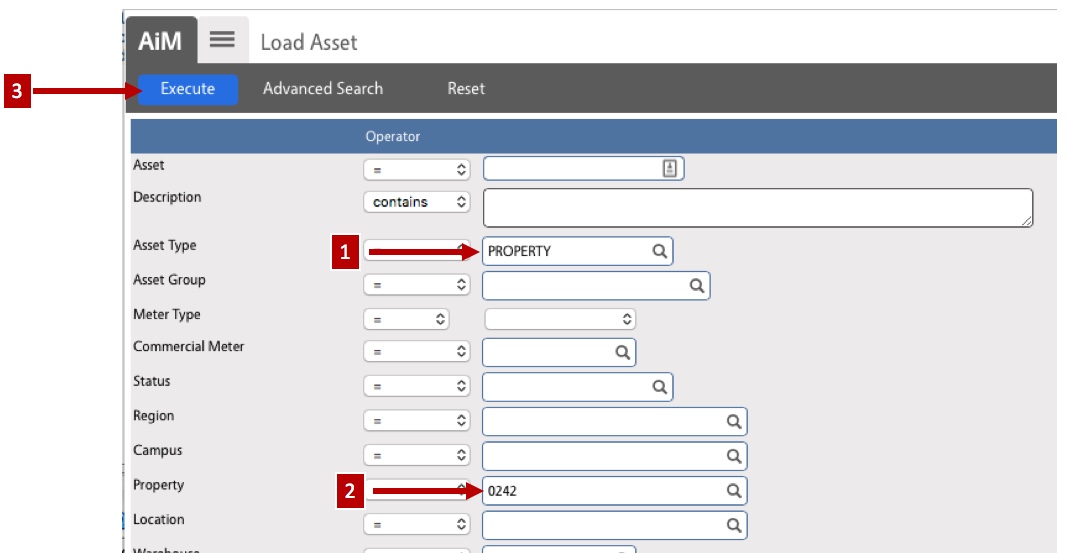 |
| Click the checkbox next to the Asset so that it becomes selected Click the Done button |
 |
| The Property Asset is now associated with the template. For the PM to generate, as with all PM’s in AiM, there needs to be an initial Last Date added. In this case the PM frequency is every 5 years, so a date 5-years prior to now should be entered . Click the Sequence link corresponding to the newly added asset | 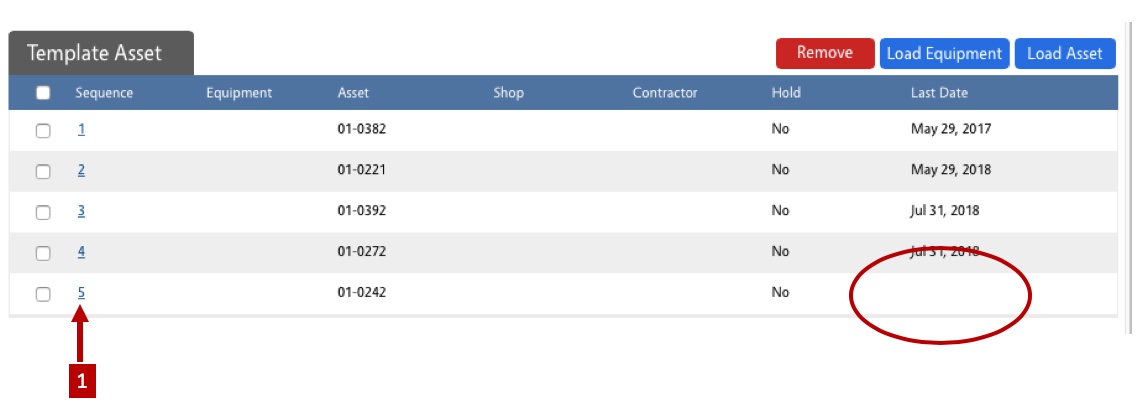 |
| Enter a date 5-years prior to now in the Last Date field Click the Done button on the Template Asset edit screen |
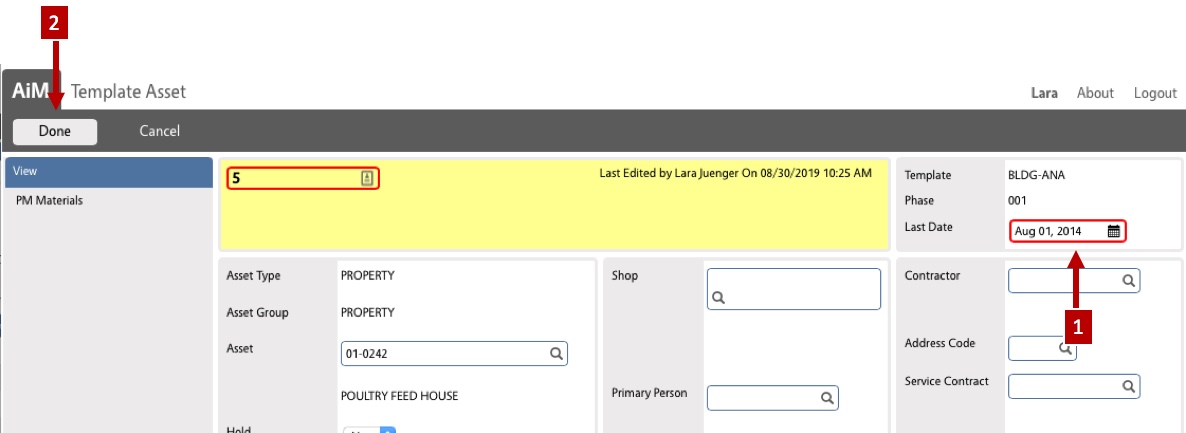 |
| Click the Done button on the Template Phase edit screen |  |
| Click the Save button on the PM Template edit screen | |
| Navigate back the the Preventive Maintenance Work Desk and click the PM Schedule Date Generator Link in the Setup | 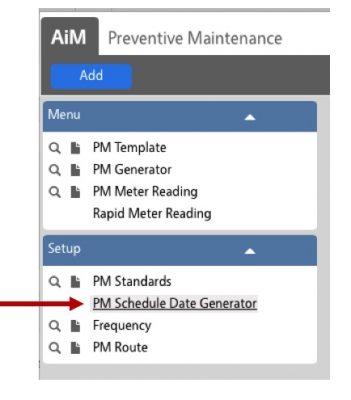 |
| Enter today’s date in the Date field and then click the Generate button |  |
| When complete a confirmation message appears, click the OK button | 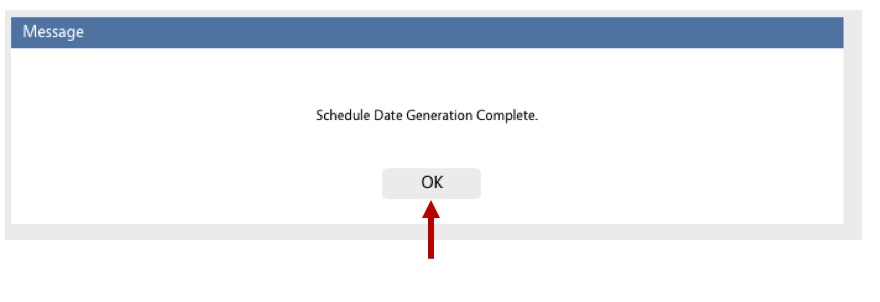 |
| Navigate back the the Preventive Maintenance Work Desk and click the PM Generator New button in the Menu | 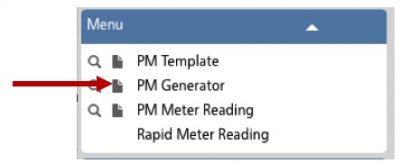 |
| Enter an appropriate description Set the End Date to today’s date Set the Template value to “BLDG-ANA” Click the Save button |
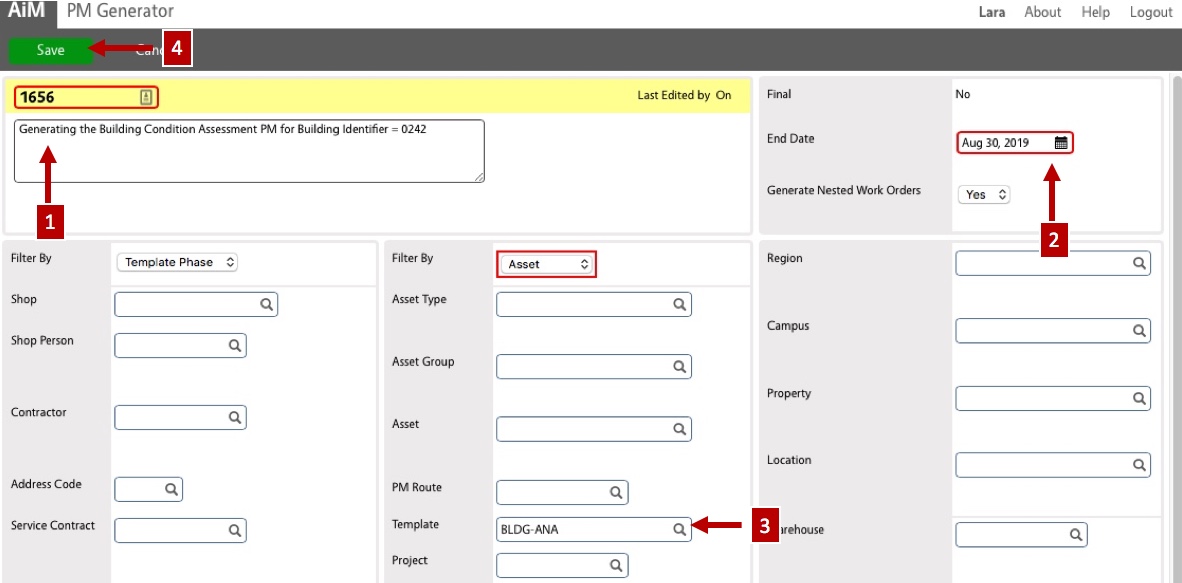 |
| The screen shows a preview of the Work Orders and Phases that will be generated. If this looks as expected, click the Generate button | 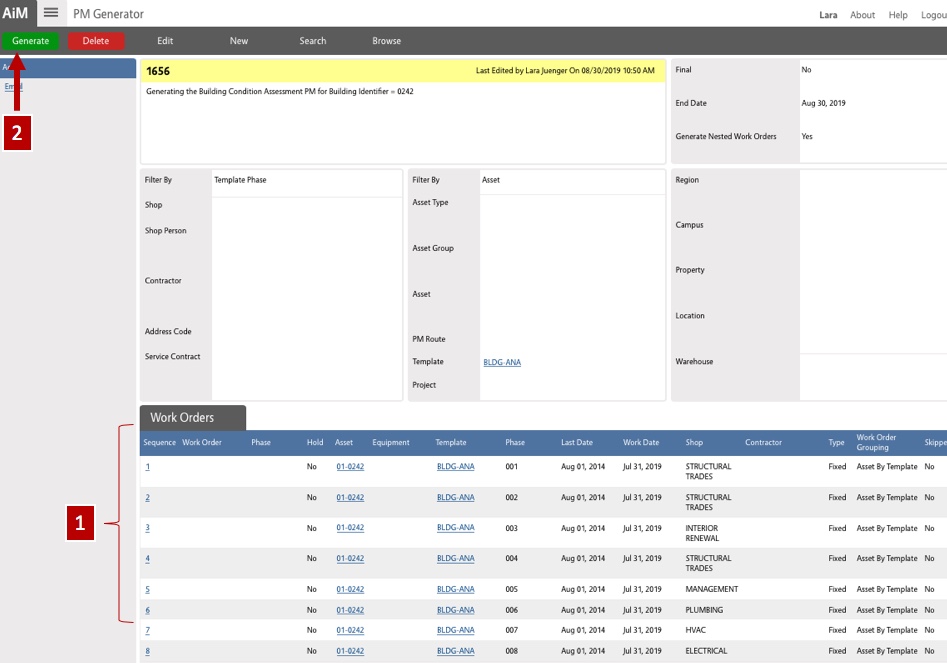 |
| Congratulations! You have initiated the creation of the Building Condition Assessment Package.
A significant number of purposefully designed AiM Inspections are now being generated. This could take a very long time, especially for buildings with a large number of rooms. Do not worry. Even if the generator times out, the Building Condition Assessment Package is being built for you. Stretch your legs. |
 |
| When the automated portion of the Building Condition Assessment Package creation is complete, the Work Orders and Phases are shown on the PM Generator Screen. | 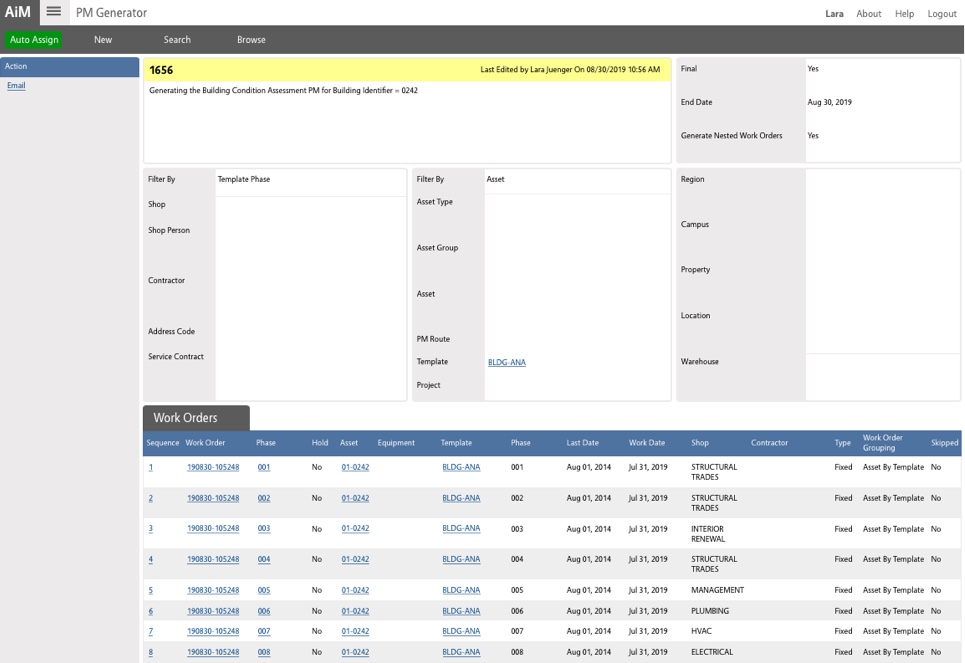 |
| To perform a final confirmation that the the automated portion of the Building Condition Assessment Package completed successfully navigate to the Asset Management Module | 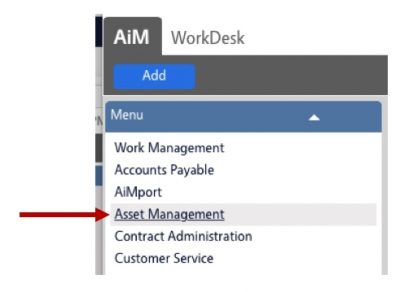 |
| Click the Magnifying glass associated with the Inspection Menu item to search for the Inspections associated with this Building Condition Assessment Package | 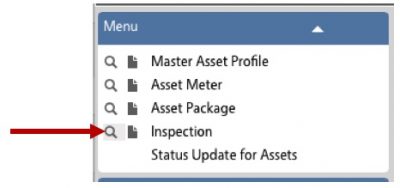 |
| Change the operator associated with the Type to “starts with” Enter “BCA_” in the Type text box Set the Edit Date to today Click the Execute button (Optionally, if you or one of your colleagues have generated other Building Condition Assessment Packages today, you will need to put the Building identifier in the Property text field) |
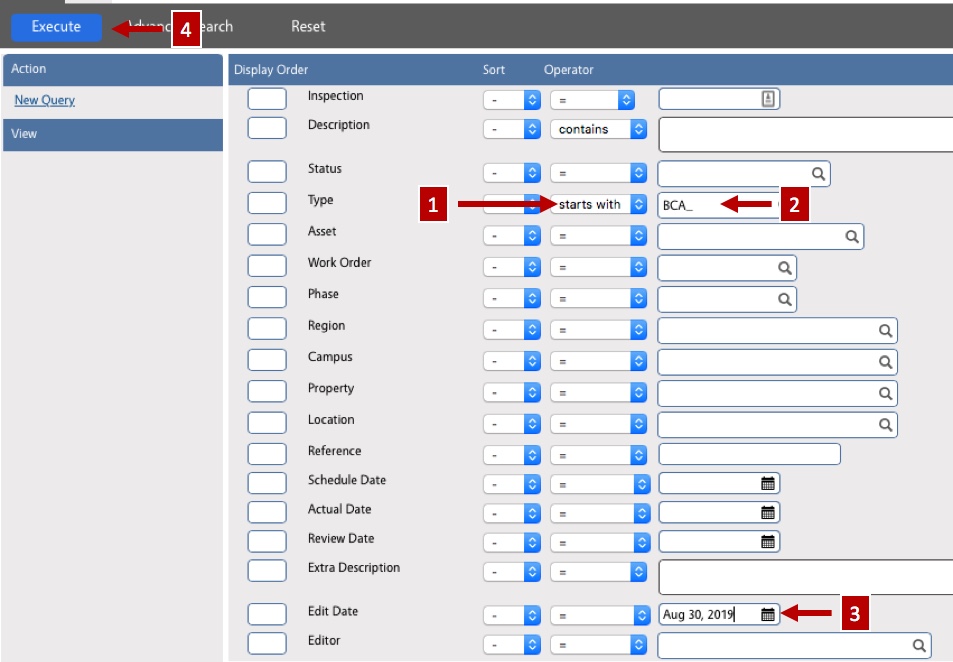 |
| At the time this document was published there were 4 types of inspections to be created for each room: BCA_INTERIOR, BCA_PLUMBING, BCA_ELECTRICAL, and BCA_HVAC)
In the example of building 0242, there are 7 rooms There should be :
…for a total of 30 Inspections |
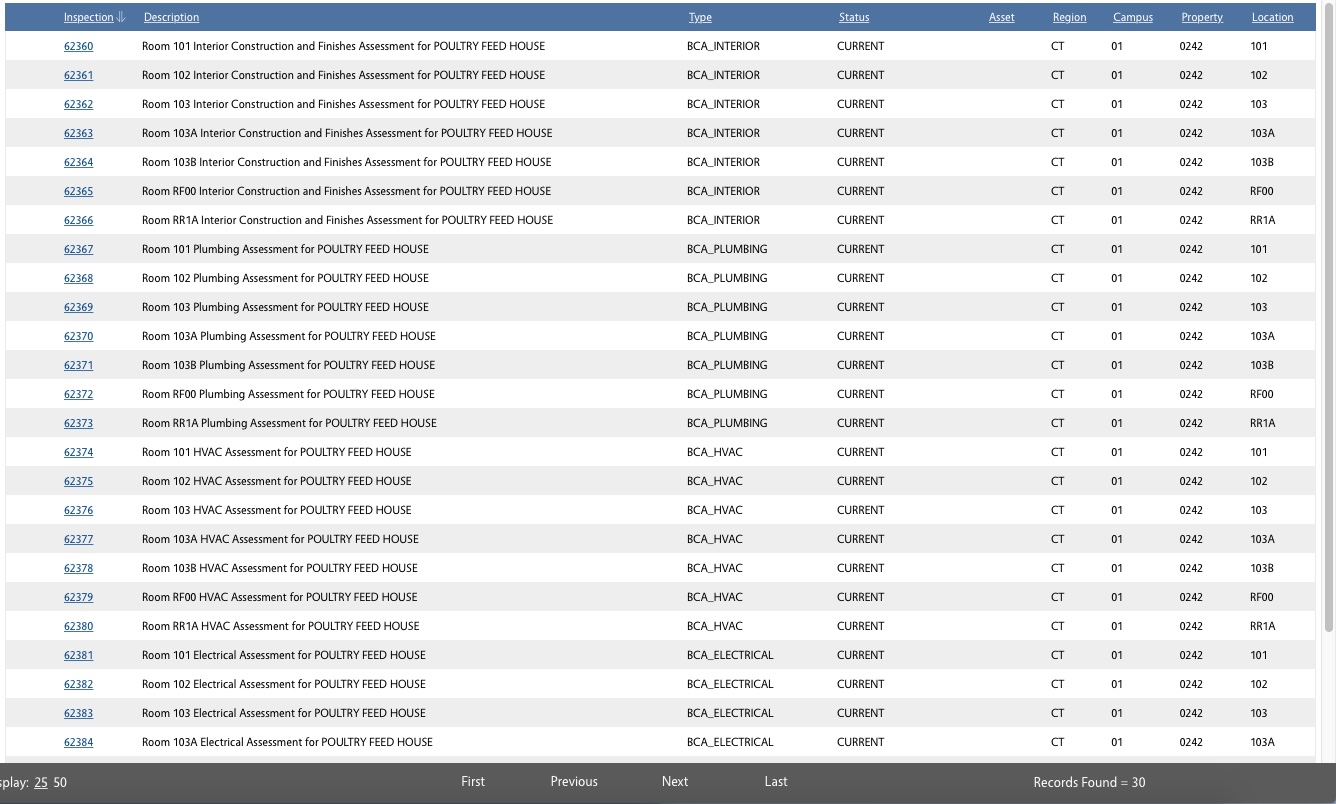 |
| Building Condition Assessment Package Manual Completion Steps | |
| Jeremy – Please complete this section so it aligns with whatever process you define to complete the process | |